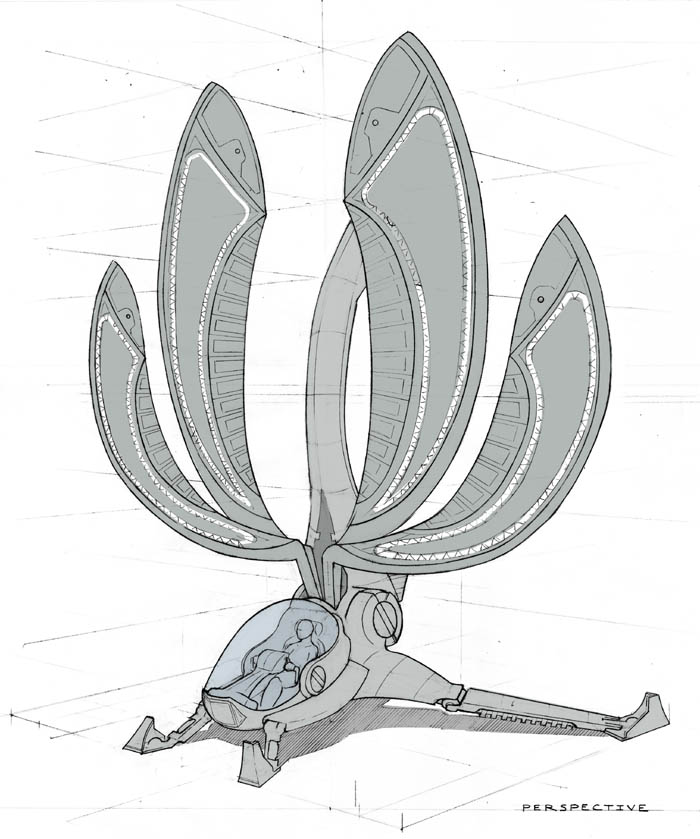
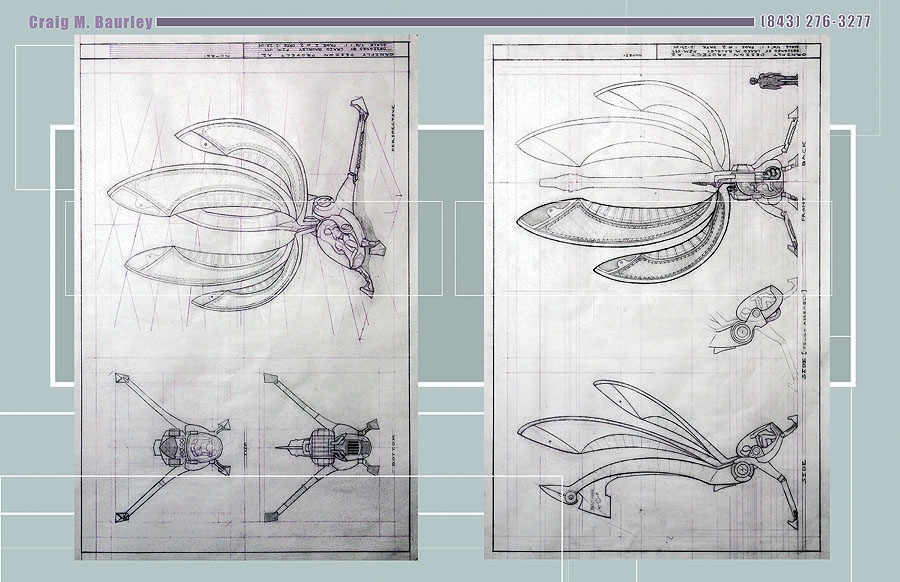
| The original drawing. This form was altered significantly as I began to create a mock-up. The above image is hand drawn and shaded by computer. |
- The Ornifly -
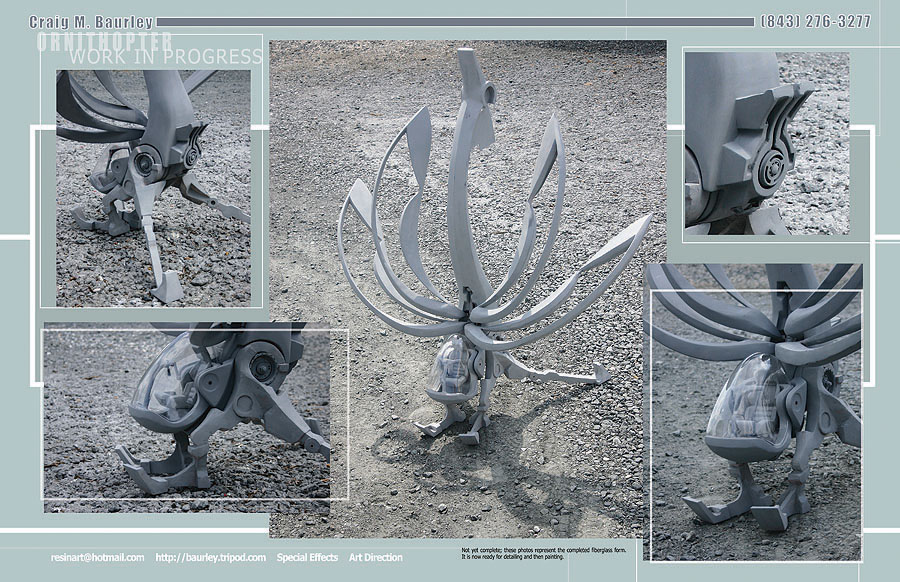
note: I personally conceived, designed, drafted, sculpted, and fabricated every element of this model on my own. It was a learning experience and an endless source of sanding. Here are the results...
|
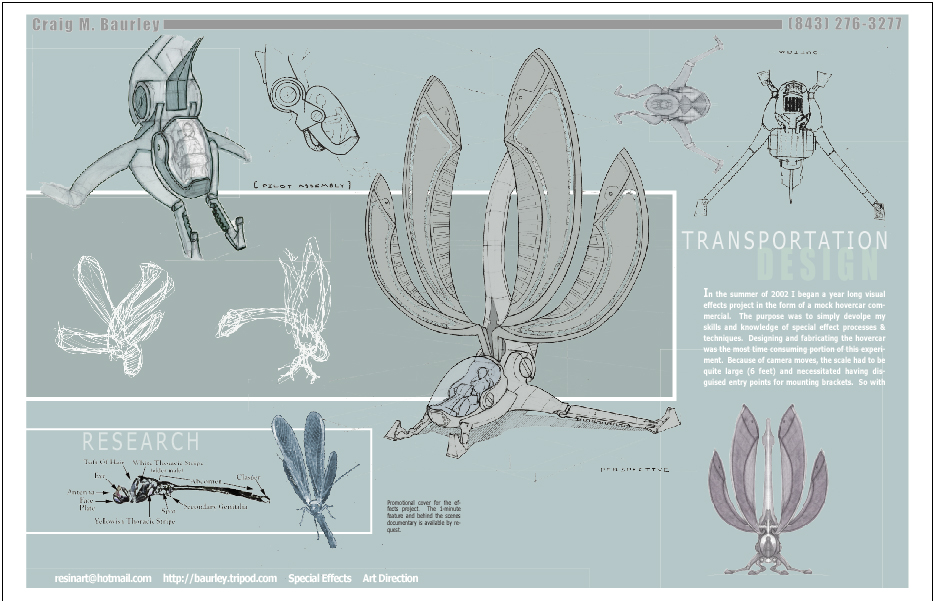
Original Design Project Premise: Nature has shown us that flying insects have a remarkable ability to lift off, maneuver, and land on any surface; these abilities far out-weigh anything man-kind has devised in terms of transportation. I propose to design an ornithopter capable of transporting one to two persons. This aircraft will attempt to mimic these attributes by modeling a mechanical aircraft from a biological marvel, the dragonfly. The vehicle's primary purpose is research and proof of concept. However, the craft will be designed with rescue missions in mind; the idea being, go where helicopters can't: vertical surfaces and access from below a target. This design will be taken to the point of a scale model. The model will not only depict the exterior shell, but also the visible inner-workings such as cock-pit and mechanics. |
 |
 |
 |

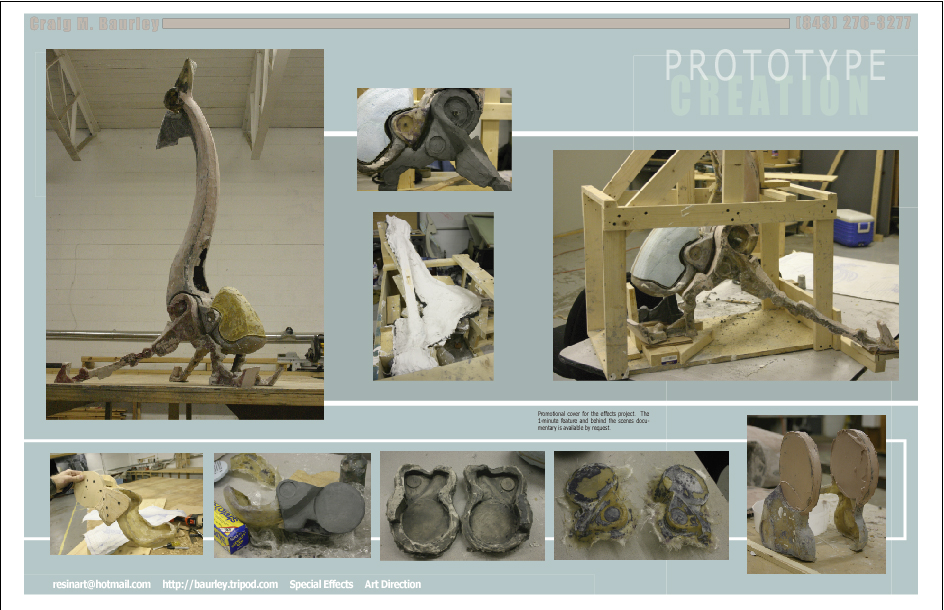
| Grey automotive primer was spot coated on to the form to reveal imperfections. These areas would be highlighted and then filled in. |

| Because of the organic form, almost every piece had to be hand crafted out of fiberglass, metal and plastic. This process entailed a clay sculpture, plaster mould, fiberglass cast, and then various levels of smoothing and fillers. Some of the smaller details were create from found parts. Note the pilot "controller" is made of hot rolled steel. |


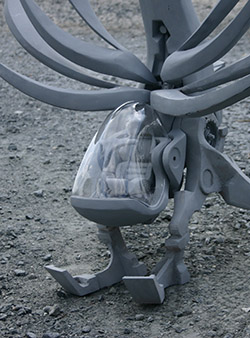
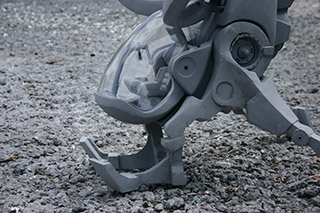
| Each leg was formed out of two fiberglass shells. Sandwhiched between them was a steel armature. The unit was then completely filled with resin. This is the heaviest component- in part to help with balance. |

| Because this model was formed out of many small parts that had to fit together in the end, I created these 1:1 mockups to size my pieces to. It helped visualize the end result while sculpting a tiny piece. |

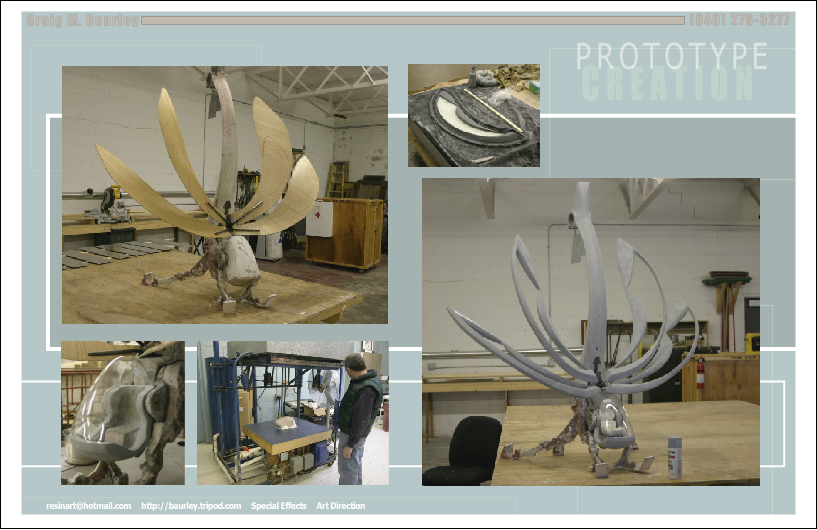
| The glass bubble was first created out of fiberglass. Here it is being perfected with Bondo filler to create a super-slick surface. This would, in turn, be vacuum formed using a PET-G plastic. Oh what fun it is to sand. |

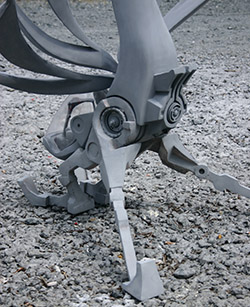
| Each wing is removable and formed around a squared-off steel rod. The picture above is the node that was welded into the body; accepting the rods. This was necessary to counter the weight of the wings and insure semetry. |

| The legs follow the contours of the head and body and needed to be sculpted against the other pieces. For this, I built a special rig to suspend the fiberglass pieces from the tail end. The picture shows the clay legs being held up only by a thin wire. |

| Whenever possible, I like to sculpt on rigid components. The wooden joint above would eventually be moulded and casted into 3 components. |

Partially Assembled.